Moodle: How to Create Groups
Groups in Moodle organize participants for filtering, communication, and differentiated activities.
Groups can be useful if:
- You have a course with multiple course sections* that have independent projects or content
- You are teaching a course with other instructors and need to view your students' grades separately
- You have group projects for which the groups need to collaborate using Moodle forums or submit as a group
- You need to communicate separately via Moodle Mail
- You have students with the same accommodation that will be used for quiz overrides, such as time and a half
*Note: Groups for course sections are automatically created. These section groups should not be edited as that may break other functions.
To Create a Group in Moodle:
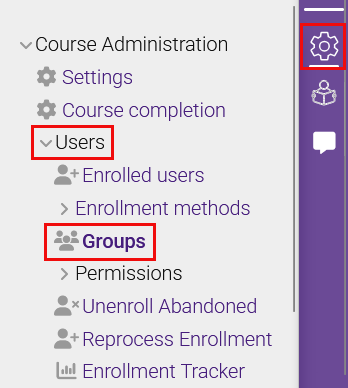
- Open the Course administration gear icon in the selected course. In that menu, click on Users, then click on Groups.
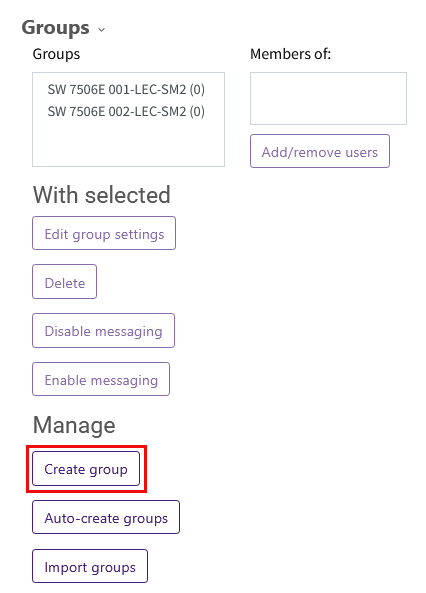
- From the Group menu, click the Create Group button.
-
Enter a Group name that clearly identifies the group (for example, “Group A” or “Accommodations Group 1”).
Optional settings: Enter a Group description for the group. Set an Enrollment key for the group if you plan to use self-enrollment with a group key. Add a group picture. Enable Group messaging (make sure an instructor or TA is a group member to monitor the group messages).
-
Use the Group membership visibility dropdown to determine who can see members of each group in the course.
Important: Choose the option that matches your instructional needs before adding members to the group. Once members are added to the group, this visibility setting cannot be changed for that group.
-
Visible - All participants in the course can see who is enrolled in the group on the Participants page.
-
Only visible to members - Only members of the same group can see who is enrolled in that group. Participants who are not members of the group do not see the group’s membership list.
-
Only see own membership - Participants can see only their own enrollment in the group. They do not see any other members of that group. These groups will not be available for grading separate groups. Use this option for specific accommodations, such as time and a half. Once the group membership is added remember to create the activity group overrides to the activities throughout the Moodle course
-
Hidden - Only the instructor roles can see the group and its members. Students do not see the group or its membership list. These groups will not be available for grading separate groups or for group overrides.
-
Select Save changes.
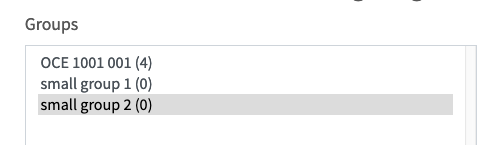
- Repeat this process until you have created all necessary groups. The groups are displayed with the number of members shown in parentheses.
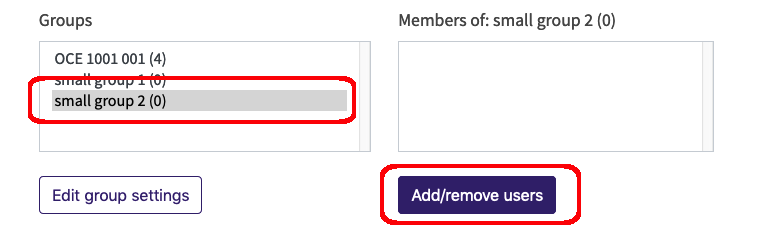
- Next to the Groups window is the Members window. To add members to your groups, select the target group on the left, and then click the Add/remove users button under the Member window on the right.
- Then, select from the Potential Members on the right and then click on the Add button to add them to the Group Members on the left. Note that, on the previous screen, members were shown on the right (not the left). Continue until all necessary members have been added and then click the Back to groups button at the bottom of the screen - there is no Save Changes button on this screen.

- Repeat the above process until all groups are created and populated with members.
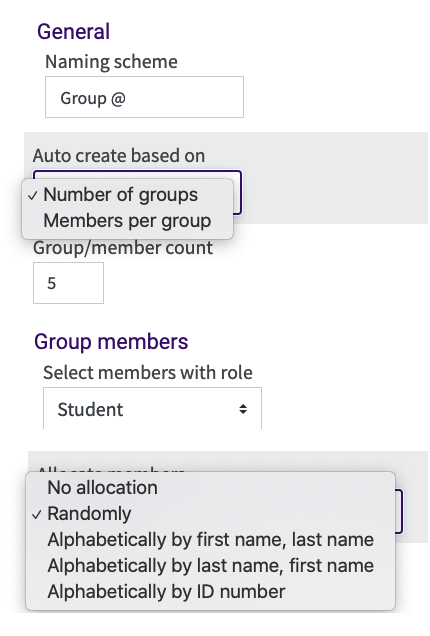
Set Automatic Group Creation in Moodle
Alternatively, Moodle can automatically create groups and assign members to them, alleviating the need to do so manually. This can be particularly useful for large classes.
- To initiate this process, simply click the Auto-create groups button rather than the Create group button.
- The required settings are depicted below.
- For the Naming Scheme, type the portion of the name to be repeated and then type an # or @ symbol to have Moodle passing consecutive numbers (Group 1, Group 2, Group 3...) or capital letters (Group A, Group B, Group C...) to the group names respectively.
- Specify either the number of groups or the number of members per group and Moodle will allocate membership accordingly.
- Also, you can limit the allocation by role (the "Student" role for example). Doing so and manually adding TA's to groups later helps to prevent groups with multiple or no TA's assigned to them.
Related GROK articles
20241
3/17/2026 4:31:17 PM