Qualtrics: Survey Tracking, Logic, and SSO
It is possible to enable SSO authentication in Qualtrics Surveys so that participants who take the survey can be identified as needed.
There is also the option to enable Personal Links which distribute a unique link to each user you would like to take the survey. To do so, please see Track Participants via Personal Link
You may also look into survey logic settings such as Skip, Branch, and Display, explained in more detail in this section: Survey Logic Options
To Set Up Qualtrics SSO Authentication:
- Navigate to http://lsu.qualtrics.com and login with your LSU ID and password. Navigate to the survey you want to enable SSO.
- On the Survey sidebar, select the Survey Flow icon to edit the survey elements.
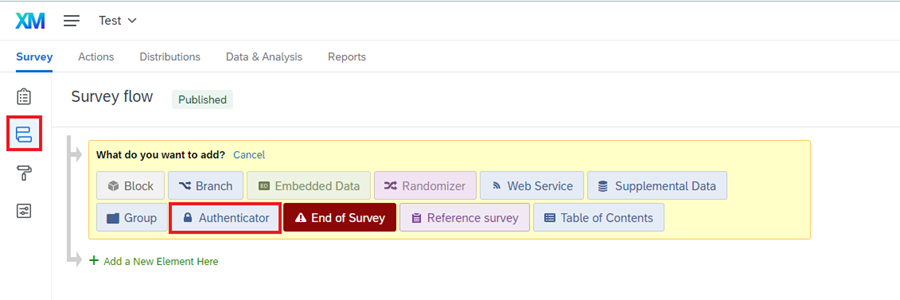
- At the beginning of your Survey Flow chart, add the Authenticator option from the suggestions.
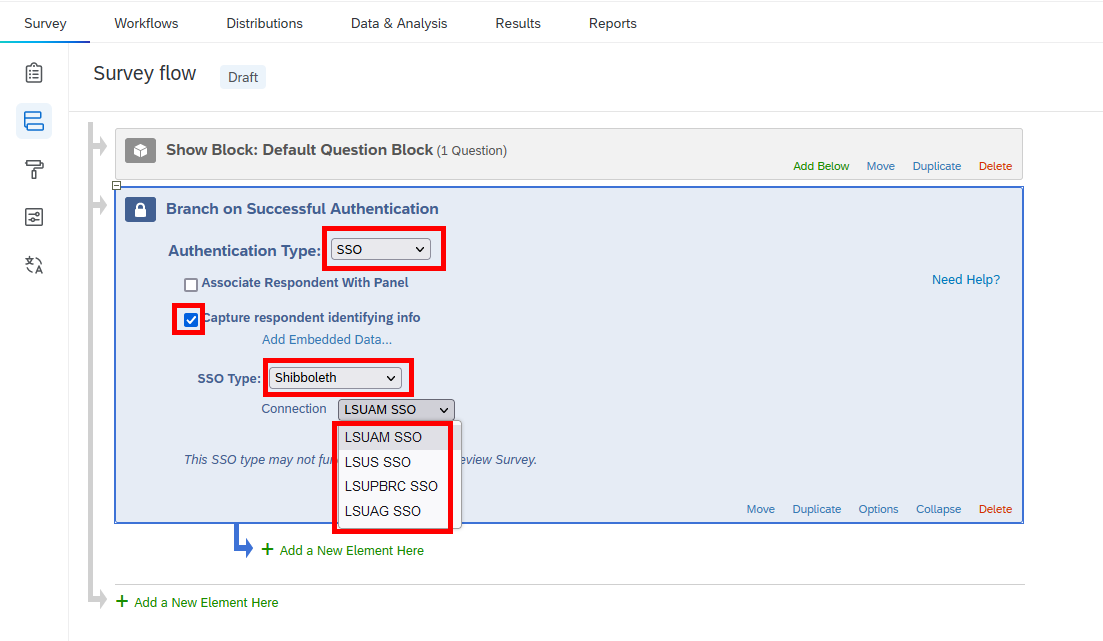
- Next, change the Authentication Type to SSO and check the box for Capture respondent identifying info (Note: You may need to uncheck the first option "Associate respondent with panel"). Then, change the SSO Type to Shibboleth, and change your Connection to one of the options that matches your division (LSUAM, LSUS, LSUPBRC, or LSUAG). Once this is configured, click the Add embedded data option.
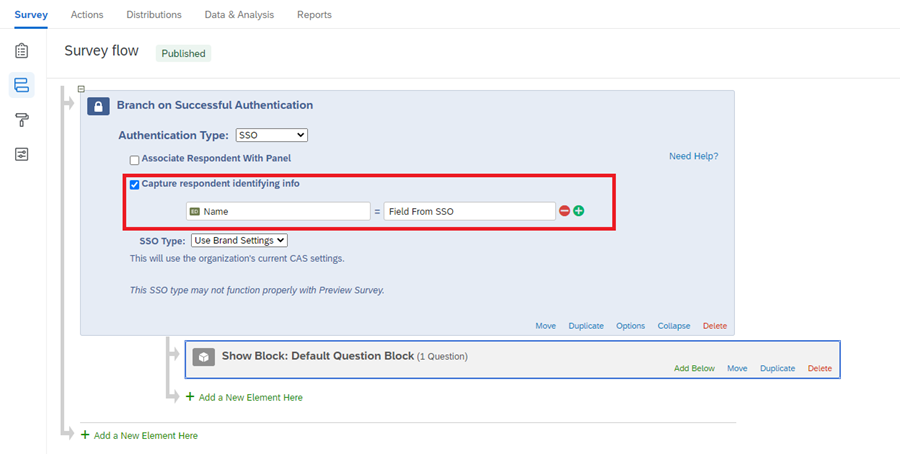
- After selecting the Add embedded data option, change the first field to say Name and leave the second blank as Field from SSO. After this, you should be able to save the settings and continue editing your survey as normal.
- PLEASE NOTE: Be sure the question block FOLLOWS AFTER the authentication block, or else the authentication will not be required before the survey begins.
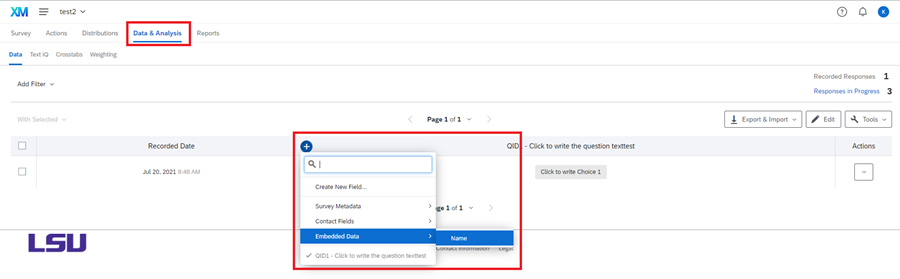
- Lastly, to display the user names of those who have completed the survey, please go to the "Data and analysis" section of Qualtrics. From here, click the blue "+" sign in between two of the columns where you would like to display the user names. Select "Embedded data" > "Name" and then a column will appear and display the user names of everyone who authenticated and successfully completed the survey.
To Track Participants via Personal Link:
For more information on distributing emails with a Personal Link, please see the following article: Qualtrics Support - Sending Individualized Survey Links
If you need to generate a list for emailing users outside of Qualtrics, please use the following steps:
- Navigate to the Distributions tab of your Survey.
- Select the Personal Links section.
- Select Generate Links.
- Note: If you have not yet activated your survey, you may see something different when you visit the Distributions tab. In this different view, you can click the Generate a trackable link for each contact option.
- Click Select Contacts.
- Select the library your contact list is saved in. If you have not yet created a Contact List, you will need to do so for distribution of Personal Links. Please see the following article on how to create a Contact List: https://www.qualtrics.com/support/survey-platform/contacts/contact-list-overview.
- Choose to send to the whole contact list, an individual contact, or a small sample of your contact list.
- Set a link expiration date (by default, links are valid for 60 days).
- Click Generate Links.
- At this point, a spreadsheet will be downloaded to your computer. This spreadsheet will include the names of your contacts, their email addresses, and their personal links. You will be able to re-download this list later by clicking the gear icon to the far right of the list and selecting Download Links.
For more information on manually generating links if you need to email users outside of Qualtrics, see: Quatrics Support - Generating a List of Personal Links.
To send Reminder or Thank you Emails, please see the following article: Quatrics Support - Sending Reminder and Thank You emails
Survey Logic Options
To create some types of conditional surveys, you may want to consider either Branch Logic or Skip Logic. If your survey is relatively simple, i.e. you just need a main group to answer a question at the beginning but then both groups answer the same questions later, you can use Skip Logic and disable going back to answer differently. You could have the first question as the group condition, and then if their entered name matches the list in your main group, they won't skip past the question.
This can be used in situations such as one group being able to add a guest to a registration request for an event, and the rest of the registrants prevented from doing so. The list of people able to add a guest can be added and then checked when they access the survey, where they will see the first question normally skipped for those not on your list.
More information about Skip Logic can be found here: Qualtrics Help: Skip Logic
If the questions differ entirely based on whether or not one condition is true, then Branch Logic would work best. This lets you create different questions based on whether or not they fulfill your condition.
More information about Branch Logic can be found here: Qualtrics Help: Branch Logic
If you have a bit more complex survey that needs to dynamically change based on other answers given in the survey, you would want to look at Display Logic. More information on this logic type can be found here: Qualtrics Help: Display Logic
Training and Support
20454
4/9/2025 10:55:06 AM