Active Directory: Creating and Locking Down File Shares
General Information:
Shared resources should be secured so that only those who need to access the resource can access the resource. While there are many ways to secure your Windows box, this document will describe the methods normally used by the Office of Computing Services Active Directory staff.
By default, Windows installs NTFS permissions with the Everyone group having full control. This should be changed to where the Administrators and the local System account have full control over all file systems on the computer (if this box is to be used as a workstation, the User account should have read permissions to the C drive).
Steps to Secure Local Account:
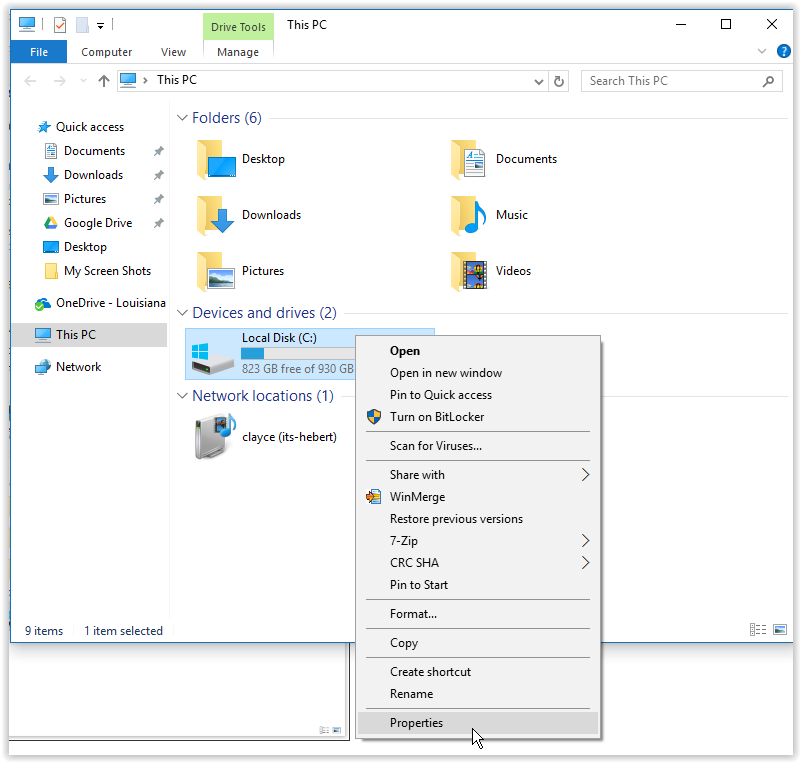
1. Open My Computer.
2. Right click on your drive.
3. Properties on the drop down menu.
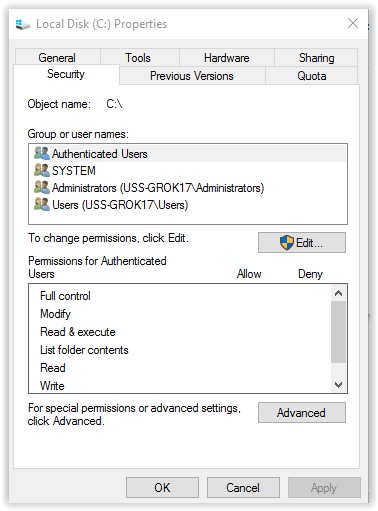
4. Go to the Security tab located at the top panel of the window.

5. In the Group or user names field, remove EVERYONE and replace it with Administrators and SYSTEM, giving them FULL CONTROL.
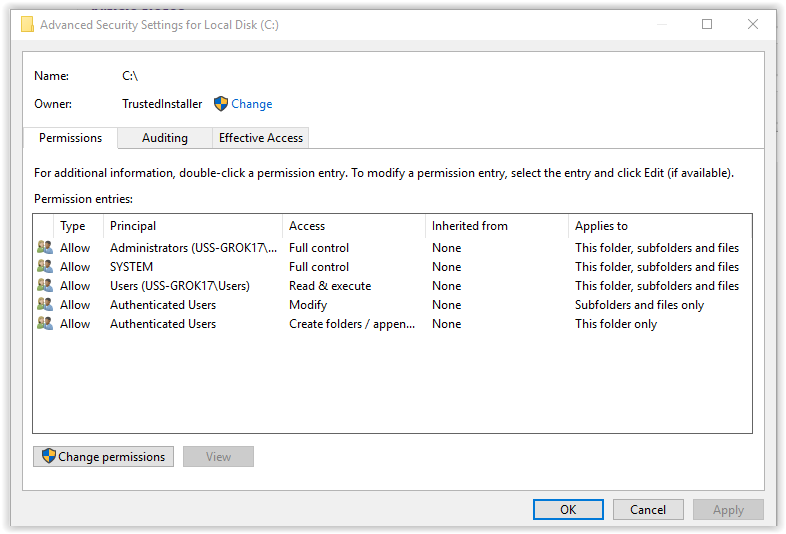
6. Click the Advanced button and on the Permissions tab on the middle of the screen. Then select Change on the next pop up window.

7. Once the permissions have completed applying, click OK at the bottom right of the screen.
Conclusion:
For Share Permissions, the Active Directory teams generally leaves Everyone with Full Control on the share permissions and then locks down the NTFS permissions. Active Directory Users should be assigned to Security Groups within the Active Directory. Those Security Groups should belong to Groups on the Server itself. Then those Groups on the Server should have access to files via NTFS permissions.
Referenced from: learn.microsoft.com
5273
9/30/2025 7:40:04 AM